
ePayPolicy's Network Payables service allows you to effortlessly and quickly send funds to multiple payees. To bolster security, we require a separate co-signer to approve payable payments.
In this guide, we'll walk you through the process to initiate and co-sign payable payments.
How to Initiate a Payables Payment
1. Login to the ePayPolicy Dashboard.
2. Click Payables in the left navigation menu.
3. Select Multiple from the drop down menu.


4. Click Excel Template to download the template.

5. Open the template and enter information in the Payable Details tab. See the Instructions Tab in the template for a step by step guide.
6. Save to updated Template file.
7. Navigate back to the ePayPolicy Dashboard and click Upload.
8. Select the saved CSV file and click Open.
9. Click Proceed.
10. Select payment method for each payment.
- Send Check: Select Mail a check option to send payment as a check.
- Send ACH: Click the Link Account button to map the payment to an existing ePay account. Select the Payment account for ACH using the drop down menu labeled ACH Send From.

11. Select the co-signer using the drop-down menu labeled Co-signer(s).
12. Click the button labeled Initiate. The co-signer will receive a notification asking them to co-sign the payment.
Co-Signing a Payables Payment
1. Begin by logging into the ePayPolicy Dashboard.
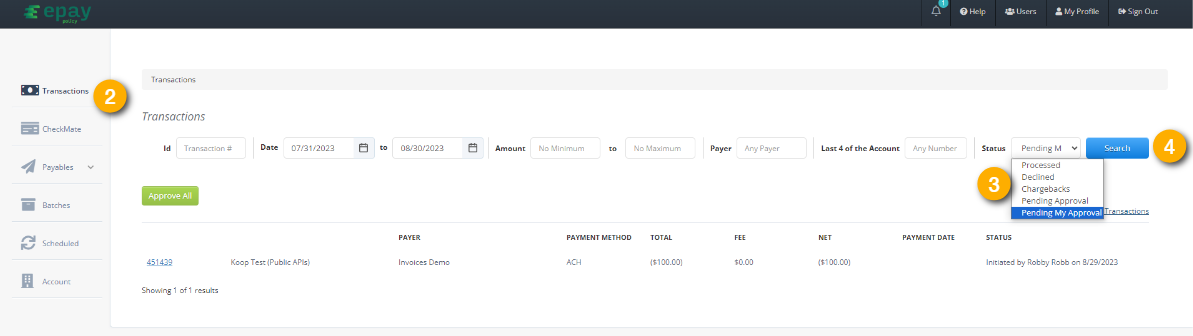
2. Click the Transactions tab in the left navigation menu
3. Click select Pending My Approvals from the Status dropdown.
4. Click Search to display pending payments.
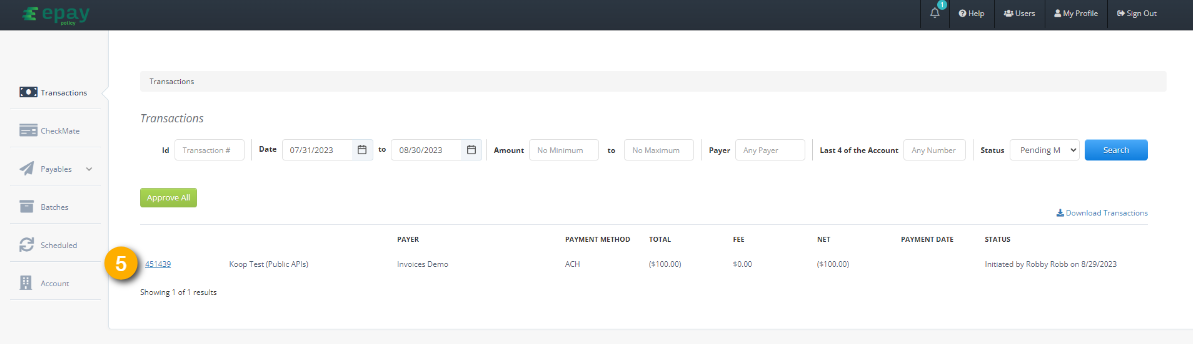
5. To review a specific payment, click on the Transaction Number.
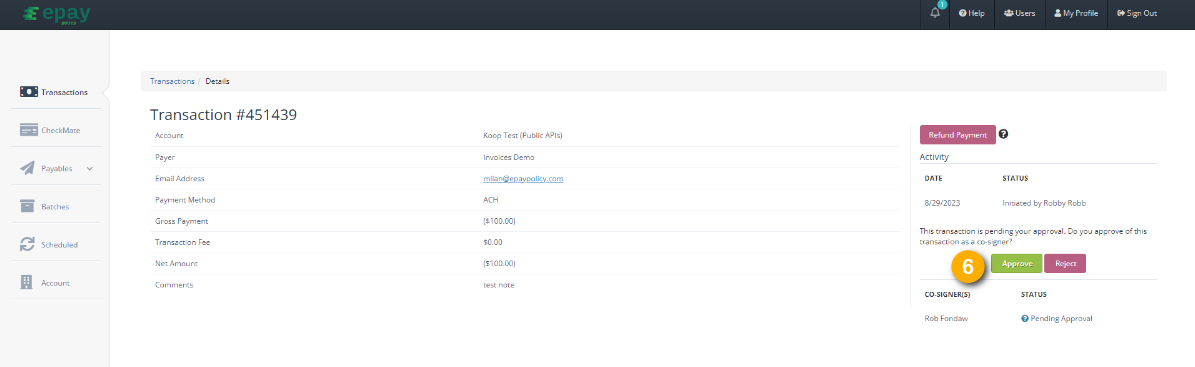
6. Click Approve.
7. A pop-up will appear, asking for your confirmation. Click Confirm to proceed.
8. Once the payable has been approved, both the co-signer and the initiator receive an email receipt.
Frequently Asked Questions (FAQs)
What if I don’t have an ID to use as the PayeeID?
No worries, you can always use the Payee Name as the unique PayeeID.
What if I do not have the Payee Email?
No worries, you can use your own email. No emails are sent to this email but the system will not let you proceed without entering an email.
Do I need to include the address on the Payable details tab of the template if I am paying by ACH?
No.
What if I do not want to include Remittance?
You do not need to fill out this tab.
What if I do not want to include all the information listed in the Remittance Details tab?
You can delete columns you do not want to use and relabel or add columns as long as you never delete the first column.
How do I get a list of my payments for PositivePay?
Each approved payment will appear as a processed transaction in the Transactions Tab. You can click Download Transactions to get a CSV list of your transactions.